• Parts Washer Maintenance: How to Tune A Gas Burner

    Parts Washer Maintenance: How to Tune A Gas Burner

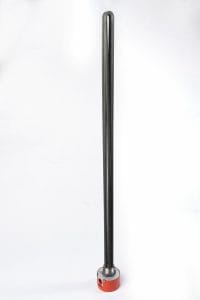
    Your ability to clean increases as the temperature increases. Many heated parts washers use industrial gas burners to reheat aqueous cleaning solution. 

    Gas burners require tuning to burn efficiently. Companies should tune gas burners periodically, adding it to your regular parts washer maintenance.

    Is your heated parts washer struggling to maintain the correct temperature? It may be time to tune its gas burner. 

    5 Steps to Tune an Industrial Gas Burner

    Combustion occurs when hydrocarbon fuel reacts with oxygen in the air. It produces carbon dioxide, water and heat. When you tune a gas burner, you adjust the fuel-to-air ratio (FAR). 

    You can find the fuel-to-air ratio by analyzing the flow of air and gas. The ratio compares the measure of fuel to the measure of air. Adjustments to this ratio can increase efficiency and prevent the burner from running too rich. 

    Inefficient burners consume more fuel and increase wear on the equipment. Tuning the burner also lets you check for any buildup, dirt or warping on the surrounding parts.  

    Always go slow and be thoughtful when tuning a gas burner. Follow safety measures set by the manufacturer and your company. 

    1. Set the gas burner to high fire. 

    You want to tune a burner when it is hot. A cold heating system can throw off your readings. Start when the heating system is at room temperature, then set the burner to high fire. If the burner system uses a blower, you should hear the blower’s motor kick on. 

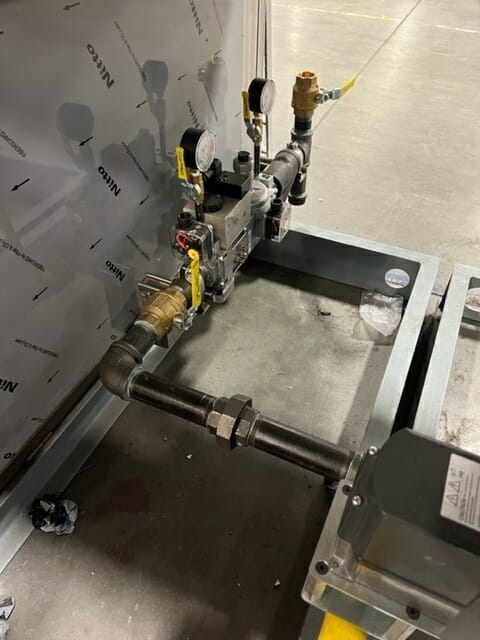
    2. Open the air header and gas header. 

    Open the burner’s valves. If your combustion heating system has multiple burners, open the valves for each one. 

    3. Allow the gas burner to reach the required temperature. 

    Before checking the oxygen levels, let the burner reach a high temperature. 

    4. Analyze the exhaust oxygen levels.

    You can use a gas analyzer to measure oxygen in the flue gas or monitor the machine’s combustion control system (CCS) if one is available.  

    Excess oxygen is excess air. Generally, the amount of excess air should be around 3%. Some excess air is necessary for safe heating. Too much excess air causes inefficiencies, as you burn fuel heating the air instead of the cleaning solution. 

    5. Make necessary adjustments. 

    Adjust the fuel flow based on your analysis from step four. Oxygen levels should be between 2.5% and 4%. 

    If the machine’s burner has high oxygen levels, increasing the flow of the natural gas will lower the amount of oxygen. Too little oxygen? Decreasing the flow of natural gas will increase the oxygen available. 

    More About the Fuel-to-Air Ratio

    Controlling the fuel-to-air ratio helps you run your heated parts washer more efficiently. Tighter ratios increase your control over combustion and reduce fuel usage. 

    Stoichiometric combustion is the “perfect” combustion ratio, but it is not always the most efficient or practical way to run a machine. You achieve stoichiometric combustion with an air-to-gas ratio of 10:1—or when the reaction consumes all of the fuel with no excess air (oxygen). 

    Combustion Products: Carbon Dioxide Levels

    Combustion creates exhaust, or flue gas. The flue gas contains carbon dioxide, water and nitrogen. 

    If you use natural gas, you want to see carbon dioxide levels between 9% and 10%. Carbon dioxide levels should remain between 10% and 12% for those using propane gas. 

    The Need for Excess Air: Safe Carbon Monoxide Levels 

    Excess air ensures a safe combustion process. Not adding enough air to the fuel means you won’t burn all of the gas. When too little oxygen is present in the mixture, it produces carbon monoxide instead of carbon dioxide. 

    According to OSHA, workers should not be exposed to more than 50 PPM (parts per million) of carbon monoxide within an eight-hour timeframe. Carbon monoxide can be deadly, so monitoring its levels and ensuring you have enough oxygen available is essential. 

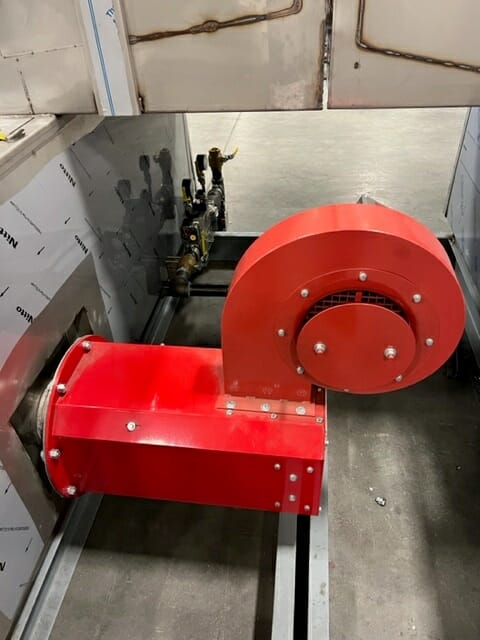
    Know What Type of Gas Burner You Have 

    The burner type can affect its consistency and heat output. Knowing what kind of burner your machine has helps you understand how heat is created and transferred. 

    Forced-draft burners utilize blowers that run continuously. The pressurized air from the blowers oxidizes the fuel. Natural-draft burners do not use blowers. These burners rely on their design to draw air in using the kinetic energy produced by the gas stream. 

    You can control the fuel-to-air ratio by:

    • Using a fixed air system so that air flow remains constant. You control output by adjusting the burner’s fuel flow. 
    • Implementing a variable-frequency drive to control the air and regulate the blower’s speed. 
    • Monitoring the flow of air and gas with sensors. A control system can regulate the flow of both air and fuel, adjusting as needed. 

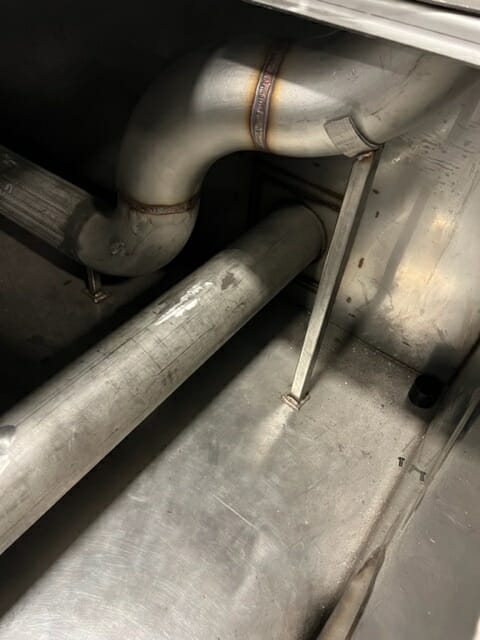
    Check Heat Transfer Surfaces

    Flue gas can cause contaminants to appear on surfaces where heat is transferred. When tuning a machine burner, take the time to look for signs of soot, scale and oxide buildup on nearby surfaces. Clean the surface if you notice any deposits. 

    Unwanted deposits are signs that something is off. You may have a low air-to-fuel ratio or improperly prepared fuel. Continual buildups may mean that your gas burner is malfunctioning. 

    Dirty heat transfer surfaces can reduce efficiency by approximately 1% for every 40℉ increase in stack temperature. 

    For the best cleaning results, you must maintain your aqueous parts washer. Add tuning gas burners to your regular parts washer maintenance. 

    When you tune the machine’s gas burners, you ensure your heated parts washer will run efficiently and safely. Tuning burners reduces fuel consumption while helping you achieve the clean you need. 

    Partner With Jenfab for Maintenance & Custom Parts Washers

    Need help tuning your parts washer’s burner? Connect with a technician to send a maintenance request. Our experienced technicians help with preventative maintenance and repairs. We can offer advice and instructions on tuning a gas burner or visit your facility to help out. 

    Is your parts washer not working as well as it used to? Time for an upgrade? At Jenfab, we design and manufacture heated parts washers to your specifications. Request a quote from our experts to get started. 

  • How to Replace a Screw Plug Heater

    How to Replace a Screw Plug Heater

    Heated parts washers boost cleaning efficiency. Heat increases chemical reaction rates, which speeds up your cleaning time and helps sanitize parts. 

    When your immersion heater stops operating correctly, your parts washer won’t clean as it should. Check your heater regularly to catch wear and corrosion that could be affecting its operation.  

    Is your screw plug heater on its last leg? Learn how to replace an immersion heater plug on a parts washer. This article covers installing a screw plug heater and choosing the best type for your application.

    How to Install a Screw Plug Immersion Heater 

    An immersion screw plug heater from Jenfab Cleaning Solutions.
    Pictured is a screw plug heater from Jenfab.

    Screw plug immersion heaters work well for warming small tanks. These heaters sit inside the solution tank, transferring heat directly to the aqueous cleaning solution. 

    Installing a screw plug heater is simple. These heaters are screwed directly through a threaded opening in the machine’s tank. Before you begin, make sure your parts washer is not in operation. 

    Do not install a screw plug heater near combustible vapors or in a flammable gas atmosphere because it could ignite. 

    If you have questions about replacing your screw plug heater, contact the experts at Jenfab. We will walk you through the process or schedule a visit to repair your machine. 

    1. Turn the system OFF 

    Ensure the aqueous parts washer is OFF and not in operation. Empty the solution tank. 

    2. Uninstall the old heater 

    Carefully remove the worn or broken screw plug heater from the threaded opening in the parts washer’s tank. 

    3. Check the new heater 

    Examine the new screw plug immersion heater for any missing pieces or damage before installing it. Do not install a heater you think may be faulty. 

    4. Review the heater’s placement 

    The threaded opening already on your tank should be in the correct position for your application. Just in case, make sure your heater placement meets these recommendations. 

    A screw plug heater should be 2” below the tank’s minimum liquid level and 1” to 2” above the maximum expected amount of sediment. 

    Screw plug heaters should always remain immersed entirely in the aqueous solution. They should always be covered by the liquid. They must be installed below the lowest liquid level that occurs during cleaning. 

    Sludge and sediment will collect at the bottom of the tank, so the heater should sit above these collections for optimal results.  

    5. Apply a sealing compound

    Before installing, cover the heater’s threads with a pipe sealing compound.

    6. Screw the heater into the threaded opening

    Bring the heater up to the threaded opening in the tank wall. Use a wrench to tighten the hex portion of the heater in the threaded opening. 

    Be careful not to over-tighten the heater. Doing so could damage the treads and cause the tank to leak. 

    Once it’s in place, test it out! Fill the tank with solution again and run a test cleaning cycle. 

    You want to ensure the tank comes to the required temperature and that the heater’s thermostat or controls are not going to get wet via condensation or a leak.

    Choosing the Right Screw Plug Heater for Your Heated Parts Washer 

    Screw plug heaters are hairpin tubular elements welded onto a pipe threaded fitting. The components of a screw plug heater include a sheath and heating elements that come in various wattages.  

    Protection from Corrosion: Sheath Material 

    Screw plug sheaths can be brass, copper, steel or stainless steel. A popular sheath material is Incoloy®, a corrosion-resistant material with a nickel-iron-chromium base. 

    An immersion heater’s sheath material must be able to withstand the cleaning solution or liquid it rests in. If you pair cleaning solutions or soils with an incompatible material, it will damage the heater.

    Sheath MaterialMaximum TemperatureCommon Uses
    Copper350℉Clean Water
    Steel750℉Oil, Petroleum 
    Stainless Steel1200℉Food Processing Equipment, Cutting Oils, Medical Equipment, Alkaline Cleaning Solutions, Wax
    Incoloy®1500℉Cleaning & Degreasing Solutions, Pickling Solutions, Corrosive Solutions

    Electrical Power: What’s Enough Watts?

    Effective heaters increase and maintain the cleaning solution’s temperature. Too much electrical power can scorch the liquid, potentially harming the parts inside the machine. Too little, and the solution tank won’t maintain its temperature.

    Screw plug heaters work best for small heated parts washers. Smaller tanks are easier for this type of immersion heater to warm and maintain. When determining the appropriate heater wattage for a parts washer, consider these three things:

    1. Startup 

    Creating the starting temperature takes the most wattage. Can the heater transfer enough heat to meet the required temperature? The temperature difference, size of the tank and type of cleaning solution affect how much power the heater needs initially to warm the tank.

    2. Operation 

    Once the heater meets the required temperature, it must maintain it without losing too much heat or overheating. Operational heat is the heat required to keep a consistent temperature during the cleaning process.

    3. Heat Loss

    Every heated parts washer loses heat as it operates. A heater’s task is to preserve the required temperature while facing potential heat loss. The tank material and insulation can decrease the amount of heat lost per cleaning cycle.

    Parts Washer Maintenance: Screw Plug Heater

    All equipment needs to be repaired or replaced eventually. You can ensure your screw plug immersion heater lasts a bit longer by first selecting a material that suits your application. Over time, buildup can form on screw plug heaters because they sit inside the liquid cleaning solution. 

    Limescale can develop if you’re heating water and water-based solutions. For those heating oils, overheating can cause coking, which may burn oil onto the immersion length of the heater. These buildups can be cleaned and scrubbed off with a wire brush.

    If your heater is no longer working, you can find a replacement online at Jenfab Cleaning Solutions. We offer spare parts and replacement heaters for parts washers. 

    Our options include 9KW, 12KW and 18KW screw plug heaters, each welded to 2” NPT fittings. 

    Not sure what you need? 

    Want our technicians to take a look? 

    Connect with a technician and send us a maintenance request today. We’d be happy to help you determine what to order or visit your facility to upgrade your worn screw plug heater.